Make room without guessing what a number means.
Clearance is added on each side of the footprint. It is a starting adjustment for a test fold, not a prediction of paper thickness.
Enter inches straight from your ruler
Choose in and enter a decimal (2.375), a fraction (3/8), or a mixed fraction with a space (2 3/8). The character ⅜ also works: 2⅜ equals 2.375 inches, or 60.325 mm. Switch to mm to inspect the converted value. Saved designs keep the underlying millimeters; the display rounds to five decimal places.
Use a space, not a hyphen, in mixed fractions. A zero denominator, an empty value or a measurement outside the supported range stops the export. Millimeter fields accept decimal numbers only.
Start with the item as it will be packed
Include existing wrap or other layers that will stay on the item. Measure its widest points. For an irregular gift, these templates use a rectangular envelope around those points; they do not follow curves or recesses.
Per-side clearance is added twice
For a tray, a 90 × 60 mm item with 1 mm clearance per side produces a 92 × 62 mm base panel. Increasing clearance from 1 to 2 mm changes that panel to 94 × 64 mm. Wall height remains the value you enter.
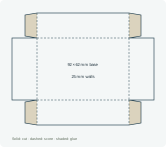
For a sleeve, clearance applies to width and thickness. A 60 mm wide, 25 mm thick item with 1 mm clearance produces four panels of 62, 27, 62 and 27 mm, followed by a 12 mm glue flap.
Keep band width and wall height separate
Band width is coverage along the sleeve’s open-ended direction. It does not make the opening wider. Tray wall height and lid depth set the height of the folded sides. Changing these values also changes how much paper is needed.
Paper thickness is not calculated
The lines represent nominal score positions. Paper thickness, score placement, fold shape and adhesive can all affect the finished size. The default 1 mm clearance is an editable example, not a tested recommendation for every material.
Change one thing at a time
Save your design before a sample. If the sleeve or lid is too tight, increase clearance and make another sample. If it is too loose, reduce clearance. Keep paper, cutting and scoring consistent so you can tell what changed.
The tool accepts decimal inches and millimeters. Enter 2.5 for two and a half inches; fraction notation such as 2 1/2 is not accepted.